
Keeping your cotton candy machine clean is key for tasty treats and a great experience. It’s important for both pros and hobbyists. How to Clean a Cotton Candy Machine, this guide will show you how to clean your machine step by step. You’ll learn how to take it apart, clean each part, and sanitize it. This way, your machine will work well and stay safe for food.
Key Takeaways
- Regularly cleaning your cotton candy machine is crucial for maintaining optimal performance and food safety.
- Proper disassembly and thorough cleaning of each component, including the bowl, floss head, and heating element, are essential step.
- Using the right cleaning solutions and techniques can effectively remove sticky residue, sugary buildup, and ensure a deep, sanitary clean.
- Reassembling the machine correctly and maintaining a regular cleaning schedule will prolong the life of your cotton candy maker.
- Adopting food-safe cleaning methods and approved disinfectants is vital for serving delicious and hygienic cotton candy.
Introduction to Cleaning Cotton Candy Machines
Keeping your cotton candy maker clean is key for making top-quality, safe, and tasty cotton candy. Regular cleaning and upkeep not only make your machine last longer. It also makes sure your customers always have a great experience. We’ll talk about why regular maintenance is important and how a clean machine benefits you.
Importance of Regular Maintenance
Cotton candy machines work hard making lots of sweet treats. Over time, they can get sticky and dirty. This can make them work poorly, be unsafe, and even affect the taste. Cleaning your cotton candy maker often is a must to avoid these problems and keep it running well.
Benefits of a Clean Cotton Candy Machine
- Improved machine efficiency and longer lifespan
- Consistent, high-quality cotton candy production
- Enhanced food safety and hygiene
- Reduced risk of equipment malfunctions or breakdowns
- Maintained flavor and taste of cotton candy
By cleaning and taking care of your cotton candy maker, you get a machine that works great. This lets you keep making delicious, fluffy cotton candy for your customers. Next, we’ll show you how to get ready for cleaning.
Preparing for the Cleaning Process
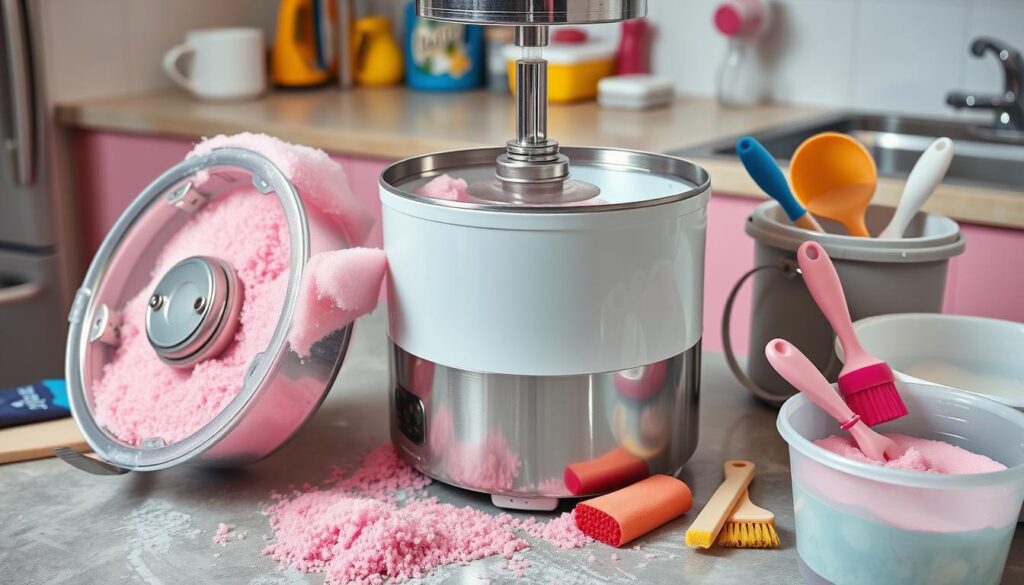
Before you start cleaning your cotton candy maker, make sure you have the right tools. You’ll need things like a mild cleaning solution, soft-bristle brushes, and rubber gloves. Also, have clean towels, a bucket for soaking parts, and disinfecting wipes ready.
With these items, you can begin the cleaning process. First, take apart the cotton candy maker. This means removing parts like the bowl, floss head, and heating element. This lets you clean each piece well and remove all sugar buildup.
“Proper preparation is the key to a successful and thorough cleaning of your cotton candy machine.”
Be careful with the parts and follow the maker’s instructions. With the right tools and a careful plan, you’ll get your cotton candy maker clean. It will be ready to make tasty treats for your guests or at events.

Disassembling the Cotton Candy Machine
First, take apart your cotton candy machine for cleaning. Remove the parts to clean every spot well. This makes sure your machine gets a deep clean.
Removing the Bowl and Floss Head
Start by unplugging your machine and letting it cool down. Then, find the bowl and floss head. Twist and lift them off carefully to avoid damage. Put them somewhere safe for the next steps.
Separating the Heating Element
Next, get to the heating element. It melts the sugar to make cotton candy. Carefully take it off the machine, noting how it fits for later. With everything removed, you can now disassemble cotton candy makers and remove sticky residue from candy floss machines. This makes cleaning easy.
Remember, cleaning your cotton candy machine well takes time and care. Follow these steps to get your machine clean and ready for making treats again.
Soaking and Scrubbing the Parts
After taking apart your cotton candy machine, it’s time to clean it. You must soak and scrub each part to get rid of sticky stuff. This is key to keeping your machine working well and lasting longer.
Choosing the Right Cleaning Solutions
For cleaning your cotton candy machine, pick products made for food-service gear. Stay away from harsh chemicals or rough cleaners that could hurt the parts. Go for cleaning solutions that are NSF-approved and food-safe. These cleaners are made to remove cleaning sugary buildup safely.
- Look for all-natural, pH-balanced cleaning products
- Choose cleaners that are non-toxic and environmentally friendly
- Ensure the cleaning solutions are safe for direct food-contact surfaces
Using the right food-safe cleaning methods for concession equipment makes sure your cotton candy machine is clean and safe to use.

“Proper cleaning and maintenance are essential for ensuring the safety and longevity of your cotton candy machine.”
Sanitizing Cotton Candy Equipment
After cleaning your cotton candy machine, it’s key to sanitize it. This step is vital for a clean and safe place for making cotton candy. Sanitizing kills any bacteria left after cleaning.
There are safe ways to sanitize cotton candy equipment. Using a special food-safe sanitizer is a top choice. These products kill many harmful germs without leaving toxins behind.
| Sanitizing Method | Benefits |
|---|---|
| Chlorine-based Sanitizer | Highly effective in eliminating bacteria and viruses, easy to use, and cost-effective. |
| Quaternary Ammonium Compounds (QACs) | Excellent antimicrobial properties, suitable for a variety of surfaces, and leave no residue. |
| Hydrogen Peroxide-based Sanitizer | Environmentally friendly, effective against a broad spectrum of microorganisms, and safe for food contact surfaces. |
Always follow the instructions when using sanitizers. This includes knowing how long to wait and how much to mix. Make sure to rinse and dry everything well to avoid any chemical smells or tastes in your cotton candy.
You can also use natural cleaners for your cotton candy gear. A mix of vinegar or water and hydrogen peroxide works well. It keeps your machine clean and your workspace smelling nice.

Choosing the right sanitizing method is important for food safety. Keeping your cotton candy equipment clean is key. With a good sanitizing plan, your cotton candy will always be safe and up to standard.
Removing Sticky Residue and Buildup
Cotton candy machines get sticky and dirty over time. This can be hard to clean, but you can make your machine shine again. Just use the right methods.
Tackling Stubborn Sugary Deposits
Sugary deposits are hard to clean because they stick to your machine. Here’s how to get rid of them:
- Soak the parts in warm water and vinegar for 15-20 minutes. Vinegar helps break down the sugar.
- Then, use a soft brush or sponge to scrub gently. You might need to work hard to get rid of the sugar.
- If some spots are still hard to clean, make a baking soda paste. Rub it on the spots and rinse after a few minutes.
- Wash everything with clean water to get rid of all the cleaning stuff.
Be patient and gentle when cleaning your cotton candy machine. Don’t use rough stuff or strong chemicals. They can hurt your machine.
“A spotless cotton candy machine not only looks great, but it also ensures the safety and quality of your sweet treats.”
Follow these steps to clean even the toughest sugar from your machine. Your cotton candy will taste better and look great.
How to Clean a Cotton Candy Machine: Step-by-Step Guide
Keeping your cotton candy machine clean is key for making tasty treats. We’ll show you how to clean your cotton candy maker step by step. This will help it work its best.
Disassemble the Machine
First, unplug the cotton candy machine and let it cool down. Take out the bowl and floss head, and remove the heating element. This lets you clean all the important parts easily.
Soak and Scrub the Parts
Put the parts in a sink or big container filled with warm, soapy water. Let them soak for 15-20 minutes to loosen any sugar or gunk. Then, use a soft brush or sponge to clean each piece well.
Sanitize the Equipment
After cleaning, sanitize all parts of the cotton candy machine. You can use a food-safe cleaner or a mix of bleach and water. Rinse everything well and let it dry before putting it back together.
Reassemble and Test
When the parts are dry, put the cotton candy maker back together. Make sure everything fits right and is tight. Plug it in and test it to make sure it works well and makes great cotton candy.
By following these steps, you’ll keep your cotton candy maker in great shape. This means you’ll get yummy cotton candy every time. Cleaning and taking care of your machine will also make it last longer.

Reassembling the Cotton Candy Maker
After cleaning and sanitizing, it’s time to put your cotton candy machine back together. Make sure all parts fit right and are tight for the best performance. Here’s how to reassemble your cotton candy maker step by step.
Proper Alignment and Tightening
- Start by putting back together the disassembled cotton candy makers parts, like the heating element.
- Make sure the floss head and bowl are in the right spot and locked in place.
- Secure all screws and bolts, checking they’re tight.
- Check the rotating part for any blockages and make sure it spins well.
- Look at the wiring and connections to make sure they’re good to go.
By doing these steps, you can be sure your cotton candy machine is ready to go. It will work better and last longer, meaning you won’t have to clean it as often.
“Proper reassembly is the key to a well-functioning cotton candy machine that consistently produces fluffy, mouthwatering treats.”

Take your time when putting it back together and check each step carefully. This careful work will keep your cotton candy maker in great shape. It will always be ready to make delicious treats.
Maintaining Cotton Candy Machines
Keeping your cotton candy machine in top shape is key for making tasty cotton candy floss. After the first clean, it’s important to keep up with regular maintenance. This keeps your machine working well and lasting longer. Let’s look at how to keep your cotton candy floss maker in great shape.
Regular Cleaning Schedule
It’s a good idea to clean your cotton candy machine often. Clean it at least once a week, or more if you use it a lot. This stops sugary residue from building up. It keeps your cotton candy floss always tasty.
- Set a specific day or time each week to clean your cotton candy machine.
- Take apart the machine and clean parts like the bowl, floss head, and heating element.
- Use the right cleaning solutions and methods to get rid of sticky sugary residue.
- Clean all parts before putting the machine back together to keep it safe for food.
Sticking to a cleaning schedule helps your cotton candy machine last longer. It also keeps your cotton candy floss always good.
| Maintenance Task | Frequency |
|---|---|
| Full Disassembly and Deep Clean | Weekly or Bi-Weekly |
| Spot Cleaning and Sanitization | After Each Use |
| Inspection and Lubrication | Monthly |
Stick to this maintenance plan. Your cotton candy floss maker will stay in great shape. You’ll get yummy and consistent results for your customers or family.
Deep Cleaning Sugary Machines
Keeping your cotton candy floss maker clean is more than just wiping it down. Sometimes, you need to deep clean it to keep it working well. This means getting rid of sticky sugar and making sure everything is clean.
Deep clean your cotton candy machine every few months or when it gets really sticky. Doing this keeps your machine running right, makes it last longer, and stops contamination.
Steps for a Deep Clean
- Take apart the machine, removing the bowl, floss head, and other parts you can take out.
- Soak all parts in warm, soapy water for at least 30 minutes to get rid of hard sugar.
- Use a soft brush or sponge to clean off any sugar left, but be gentle with the parts.
- Rinse everything with clean water to get rid of soap or sugar bits.
- Clean the machine with a food-safe disinfectant, making sure to get into all the nooks.
- Let everything dry before putting your cotton candy floss maker back together.
By doing these steps, your cotton candy machine will be clean and ready to make fluffy treats. It will work better and make your treats taste great.
| Task | Frequency |
|---|---|
| Regular Cleaning | After each use |
| Deep Cleaning | Every 3-6 months |
Keeping your cotton candy floss maker in good shape means tasty treats and safety. Take the time to deep clean it. You’ll get great results for a long time.
Food-Safe Cleaning Methods
When cleaning a cotton candy machine, it’s key to use safe cleaning products. This ensures the cotton candy is safe and pure. We’ll talk about the cleaners and disinfectants you can use on food equipment.
Approved Cleaners and Disinfectants
For a clean cotton candy machine, use cleaners made for food surfaces. Here are some top picks:
- EPA-registered food-grade sanitizers and disinfectants
- Mild, non-abrasive detergents for kitchens
- Stainless steel cleaners and polishes
- Enzyme-based cleaners for sugar buildup
Don’t use harsh chemicals, bleach, or rough scrubbers. They can harm the machine and leave dangerous residues.
| Cleaner/Disinfectant | Key Features | Benefits |
|---|---|---|
| Sani-Chlor Food Surface Sanitizer | EPA-registered, chlorine-based disinfectant | Works against many bacteria and viruses, safe for touching food |
| Ecolab Oasis 146 Multi-Tiered Sanitizer | Quaternary ammonium-based disinfectant | Kills 99.999% of germs, won’t corrode, and has no smell |
| Dawn Professional Dishwashing Liquid | Mild, grease-cutting detergent | Gets rid of tough sugar, safe for cotton candy machines |
Using these safe cleaning methods and products keeps your cotton candy machine ready. It also makes sure the cotton candy is safe and quality.
Cotton Candy Maker Cleaning Tips
Keeping your cotton candy maker clean is key for making safe, tasty treats. Cleaning might seem hard, but there are ways to make it easier. These tips will help you clean your machine fast and keep it working well.
Time-Saving Techniques
Having the right tools is a big help. Get a special brush for cotton candy machines and a soft scrubbing pad for tough spots. Also, keep microfiber cloths handy to quickly clean and dry parts.
Learn how to take apart your cotton candy maker before you start cleaning. Check the instructions from the maker. This saves time when putting it back together and makes sure it works right.
Make a special spot for cleaning. Pick a clean, bright area where you can easily take apart, soak, and put back together your machine. This cuts down on moving the machine and losing parts.
| Time-Saving Tip | Description |
|---|---|
| Invest in Dedicated Cleaning Tools | Use a cotton candy machine cleaning brush and a non-abrasive scrubbing pad to tackle sticky residue efficiently. |
| Familiarize Yourself with Disassembly | Review the manufacturer’s instructions to understand the proper way to disassemble and reassemble your cotton candy maker. |
| Designate a Dedicated Cleaning Area | Set up a clean, well-lit workspace to streamline the disassembly, cleaning, and reassembly process. |
Using these tips makes cleaning your cotton candy maker easy. Your machine will always be ready to make yummy, fluffy treats.
Troubleshooting Common Issues
Even the best cotton candy machines can sometimes have problems. If you’re having trouble, don’t worry. We’ll help you fix common issues and keep your machine working well.
Sticky residue and sugary buildups are common problems. To fix this, clean your machine deeply as we explained before. Regular cleaning stops sugary messes from messing up your machine. This way, you’ll always get fluffy, tasty cotton candy.
Also, watch the heating element and motor closely. They might need to be replaced or fixed over time. By keeping an eye on them and fixing problems fast, you can make your cotton candy machine last longer. This means you can keep giving your guests yummy treats.